Learn

-
Serving Beer
Pouring Beer
Learning the correct way to serve beer is probably the quickest and easiest thing a person can do to enhance their drinking experience. Ever remember being at a bar and getting handed an ordinary pint beer with absolutely no foam and the beer poured right up to the lip of the glass? If not, I don’t blame you, since I’m sure the experience was not memorable. On the other hand, can you remember being given a truly beautiful looking beer? Perhaps it was a wheat beer served in a tall, curving glass with a huge head of foam, and maybe a wedge of lemon placed on the rim? Or was it an ornate chalice filled with ruby red Belgian dubbel? Maybe it was a bright pilsner served into a tall, thin glass with a dollop of white foam on top. Chances are, those experience come more easily to mind. And while the beer itself may not have been different from the first scenario to the next few, the serving technique was, and it most likely had an impact on you whether you realized it at the time or not.
Pouring Beer from The Beer Temple on Vimeo.
Temperature
Most beers have an ideal serving temperature. There’s a chart below outlining which styles are served at what temperature, but as a general rule the temperature at which to serve a beer is correlated to the strength of the beer. As beers go up in alcohol, they are generally drunk at a warmer temperature. This is because stronger beers often are sipped slowly, and enjoyed for their complexity of flavor and aroma while weaker beers are often consumed for refreshment. For no style is this more apparent than American macro lagers, which are generally drunk so cold that you can’t taste them. There’s a reason those big brewers want people to drink their beers at tongue-numbing temperatures. As they warm up, they don’t taste very good.
Very Cold: 35-40°F Cold: 40-45°F Cool: 45-50°F Cellar: 50-55°F Warm: 55-60°F American Adjunct Lagers
Malt Liquors
Light or low alcohol beers
Pilsner
Light-bodied lagers
Kölsch
Belgian Wit
Hefeweizen
Berliner Weisse
American Wheat
American Pale Ales
Medium-bodied lagers
India Pale Ale (IPA)
Porters
Alt
Irish Stouts
Sweet Stouts
Sour Ales
Lambic/Gueuze
English Bitter
Strong Ales
Baltic Porters
Bocks
Scotch Ales
Belgian Ales
Trappist Ales
Imperial Stouts
Belgian Quads
Belgian Strong Ales
Barleywines
Old Ales
Dopplebock
Eisbock
-
Glassware
Beer glassware comes in many shapes and sizes.
In Belgium, it’s common to have a different glass for each brand of beer! While breweries may claim that the glasses were designed specifically for their beer, and there’s no arguing the fun in drinking a beer from its own specific glass, the fact of the matter is that there are really only a few types of glasses you need to know about, in addition to a couple general principles about beer glassware.
Size
When drinking beer, the size of the glass matters. As the strength of the beer you are drinking goes up, the size of the glass you are drinking it from should go down. The reasons for this are pretty obvious. First, you generally drink strong beers in smaller portions, so you want the glass to be full at that portion size. That way, you aren’t drinking your 6 oz. tasting of English Barleywine as a thin film spread across the bottom of a 2 liter German boot, although that would be pretty awesome. Second, in big glasses, gravity aids in getting the beer to your mouth quickly. When taking a sip of that refreshing pilsner, as you tilt that long, tall glass up into the air, there’s a lot more beer being pulled towards your mouth. This accelerates the beer and makes taking big, satisfying sips easier. Try doing that with the English Barleywine and it will be half gone by your second sip. And since the Barleywine is likely two to three times the strength of the Pils, you’ll be half gone too!
Shape
As you most likely already know, there’s a wide variety of shapes for beer glassware. Usually the shape of the glass will highlight the defining feature of the beer that should go in it. With wheat beer glasses, for example, the tall, thin, lower portion of the glass highlights the striking color of the beer, while the bulbous top portion leaves plenty of room for a large fluffy head of foam. The overall size of the glass also makes it easy to drink large, thirst-quenching sips. Glasses that curve inwards toward the top, such as snifters and tulips, focus beer aromas at the rim of the glass. This is perfect for beers with complex noses, like Belgian Tripels or Imperial Stouts.
Types
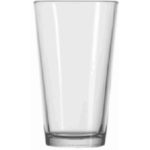
Shaker Pint
The Shaker Pint was originally designed for bartenders to mix drinks in before serving. But the extremely sturdy – and cheap – shaker pint quickly became the glass of choice for beer in America. This glass lends little to the drinking experience.
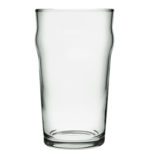
Nonic Pint
The Nonic pint is basically the Shaker pint’s European cousin. The glass of choice in the UK, the Nonic has rounded flares at the top, presumably to help grip the glass, and is more visually appealing than the Shaker pint.
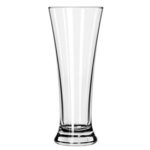
Pilsner Glass
Despite the name, Pilsner glasses are great for any light or medium bodied lager, such as Helles, Vienna, Dortmunder, and of course, Pilsner. The fluted shape of the glass promotes head retention and allows the delicate aromatics of lager to be released. They are also designed for drinkers to take large, refreshing gulps. Prost!
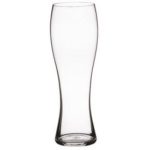
Weizen Glass
The tall, thin weizen glass is sure to get some ooh’s and ahh’s when served at the local pub. The lower portion of the glass highlights the striking color of the beer, while the bulbous top portion leaves plenty of room for a large, fluffy head of foam. The overall size of the glass also makes it easy to drink large, thirst-quenching sips.
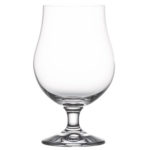
Tulip Glass
Tulip glasses are perfect for a wide range of craft beers. The stem at the bottom keeps your hand from prematurely warming the beer, the inward curve toward the top collects aromas, and the oversized height of the glass above the bulb allows for plenty of foam. The most famous, and perhaps most beautiful tulip glass is made by the Belgian brewer Duvel Moortgat for their signature beer Duvel. When in doubt, reach for a tulip glass.
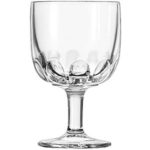
Goblet/Chalice
Goblets are most often associated with Belgian Abbey style ales such as Tripel or Dubbel. The heft of the glass matches the heft of the beer within, and the wide mouth of the glass allows for generous sipping. Goblets can be quite striking, and the custom versions of the glass for Trappist breweries such as Chimay and Orval have become synonymous with their beers.
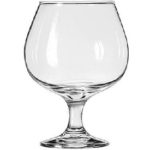
Snifter
Snifter glasses are best used for strong, highly complex beers such as Russian Imperial Stout or Barleywine. The inward curved glass concentrates the aromas of the beer towards the drinker’s nose, and the large bulb allows room to swirl the beer, helping release the aromatics.
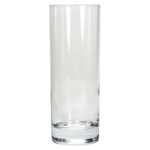
Stange Glass
Classically used for Alt Beers, Kölsch, Gose, and Pilsners, the stange beer glass is a simple cylinder shaped glass. They are typically used to serve a smaller volume of beer, less than 8 ounces. Visit a pub in Germany and you may see waiters carrying around special trays called Kranz to hold stange glasses.
-
Ingredients
Beer is a deceivingly simple drink.
Usually, it only has four ingredients: barley, hops, water, and yeast. However by adjusting these ingredients in small but significant ways, or by adding additional elements to the mix, brewers have an unlimited palette from which to paint from. The section below will give an overview of brewing ingredients, and how they can affect the final outcome of a beer.
Grains
Grains form the foundation on which beer is built. They lend flavor, aroma, color and mouthfeel to beer. They also provide the raw ingredients needed for the yeast to create alcohol. Quite simply, without grain, there is no beer.
Many grains can be used to brew beer. Without looking too hard, you can find beers brewed with wheat, oat, corn, rice, or rye. But without question, the undisputed king of brewing grains is barley, specifically malted barley.
Why is barley the brewing grain of choice? Well, as brewing Jedi Master Randy Mosher puts it, “Barley is the perfect brewing grain.” That’s because it naturally contains almost everything needed to make beer: high starch content, the enzymes needed to convert the starch to sugar, and proteins to aid in yeast health. Barley’s husks are even perfectly suited to act as a filter during the brewing process – which is crucial, as anyone who has ever had their brewing system gummed up with wheat or rye can tell you. Barley is so perfectly designed for making beer that anthropologists have suggested that the reason it was domesticated in the first place, roughly 10,000 years ago, was so that people could brew beer.
Six Row vs. Two Row Barley
There are two primary types of barley grown for brewing beer: two-row barley and six-row barley, each with their own set of distinct characteristics suited for different beer styles.
Six-row barley contains a higher enzyme count than two-row, making it the ideal barley type for American-style adjunct lagers since most adjunct grains do not contain enzymes themselves and require the added enzyme levels to help release their sugars.
Two-row barley contains plumper kernels, with higher starch levels for conversion to fermentable sugars. Two-row also has thinner husks and lower protein levels; it is the choice barley type for all-malt beers.
Malting Process
You may have noted that when people talk about the ingredients of beer they always refer to malted barley instead of just saying ‘barley’. This is because without the malting process the grain would be filled with complex sugars (starches) that are not digestible by brewers yeast. The malting process allows enzymes within the grain to form. These enzymes, when activated during the brewing process, will break down the grain’s long chains of complex sugars into more yeast-friendly simple sugars, such as maltose.
The actual process of malting is a series of several events. First, the person overseeing the process, called a maltster, soaks the grains in water to hydrate them. After a day or two, the maltster removes the grains and aerates them to induce germination. It’s at this time that the barley grains begin to sprout. The first sign of this germination is a small rootlet that appears out one end of the grain. The length of this root has a direct relationship to what’s going on within the barley kernel, so the maltster keeps a close eye on its progress. When the rootlet has reached a length equal to that of the kernel, the malt is said to be fully modified, meaning that the enzymes are now present in the barley, and all the starch has begun to be broken down to simpler sugars. Once this occurs, the maltster quickly heats the grains to kill them and stop the germination process. If the maltster stops this process too soon, there will still be starches in the barley that could have been converted to sugars, creating what is called undermodified malt. If the maltster does not act quickly enough, then the barley may begin consuming some of its own sugars as part of the growth process. This is called overmodified malt. It’s a very fine line for sure, and the timing must be perfect in order to make the highest quality malt.
Once the maltster has dried the kernels to stop seed growth, they continue to apply heat to toast the grain. It is this toasting process that provides the color and malty taste to beer. The lighter the toast, the lighter the color and malt profile it will lend to the finished beer. The heavier the toast, the darker and more full-bodied the grain will make the beer.
The lightest malts are called base malts and they make up majority of the grain bill for most beers. Even the darkest most flavorful Imperial Stouts will contain something in the neighborhood of 75% base malt. Base malts are typically dried quickly and at lower temperatures than darker malts. Pale, Pilsner, Vienna, and Munich are all example of base malts.
Darker malts, often called specialty malts, are darker and more flavorful than base malt. These malts start out the same as base malts, but are placed in a roaster after kilning. Barley roasted for short periods of time are said to be toasted and provide beers with rich, biscuity flavors and aromas. Malts roasted for longer periods are referred to as roasted malts and can take on intense coffee and chocolate-like flavors.
A little of these malts go a long way. Just a few percentages of a heavily roasted malt, such as black malt, can dominate the flavor of a beer. At extremely low quantities, they can also be used to dial in the desired color of a lighter brew. In fact, I’ve heard rumors that even Budweiser uses some black malt to help give an inkling of color to it.
Crystal Malts
The third major type of malts are crystal malts. Unlike other specialty malt types, crystal malts are not kilned prior to roasting. Instead, they are added directly to the roaster while wet and continually sprayed with water to be kept moist during cooking. The result is an intensely caramel like flavor. As a result of their unique roasting process, they also contain a portion of caramelized sugars which are no longer fermentable, thus lending a level of sweetness to the final beer.
Other Grains
While barley is the overwhelming favorite grain for brewers, it’s not their only choice. Beers brewed with Wheat, Rye, Oats, Rice, Corn, and sorghum can all be found without needing to look much further than your local beer store (with a decent selection).
These grains, and others, are collectively referred to as adjuncts when used in brewing beer. Adjuncts are never used exclusively in modern day commercial beers. Instead, they are as a supplement to the barley, lending texture, head retention, aroma and taste.
Wheat
After barley, the most well known brewing grain is wheat. Wheat has been used in brewing for about as long as barley; to this day, it is still central to many popular styles such as Hefeweizen, Belgian Wit, and American Wheat ales. Wheat beers are known for their creamy textures and huge fluffy heads of foam, both of which are hallmarks of wheat. In fact, many “non-wheat” beers use a small portion of wheat in their grain bills to help with head stability.Rye
Using rye as an adjunct can lend beers a fantastic, spicy flavor and aroma. Though once quite popular as a brewing grain in Germany and various northern European countries such as Russia and Finland, rye has fallen out of favor in modern times. This could easily be at least in part due to rye’s notorious reputation as being difficult to brew with, turning an otherwise perfectly good brewing mash into gummy cement. For this reason, rye is usually used in moderate amounts and often accompanied with wheat. Even so, a little rye goes a long way and just a small amount can lend a huge punch of spicy flavor to beer. Like wheat, rye is also great for helping keep a fluffy head of foam on beers. Very recently, rye has begun to make something of a comeback in American craft breweries, who often pair the grain’s peppery flavor with hop bitterness.Oats
Another grain with a checkered brewing history is oats. Once commonly used across Europe, the use of oats in brewing beer seemed all but extinct a hundred years ago. Then, around the early part of the 20th century, oats experienced a resurgence as brewers began marketing the nutritious qualities of oatmeal stout. Seen as a bit of a medical cure-all, British doctors were prescribing the beer to everyone from invalids to nursing mothers. Before long, the British government put an end to brewers advertising their beers as medicine, but by then people had gotten a taste for the rich, creamy taste of oatmeal stout, and it’s been around ever since. Like wheat and rye, oats help aid with head stability in beer. Oats also lend a slick ‘oily’ mouthfeel to beers.Rice and Corn
The next two adjuncts, rice, and corn are both the most widely used and the most looked down upon by beer connoisseurs. This is because rice and corn are the adjuncts of choice for many of the macro lagers around the world, as they try to lend alcohol to a beer while having it remain light and drinkable (and as detractors would argue, tasteless!). This does not always need to be the case, however. Some crafts brewers use these adjuncts as well. In particular, beers brewed with wild rice can be wonderfully flavorful and worth searching out. But for the most part, you won’t even know these adjuncts are in your beer at all, which is just what the brewers want!Hops
While grains form the backbone of all beers, if left unchecked, they can cause a beer to become undrinkably sweet. That is why brewers add other ingredients, usually something bitter, to counterbalance the malt. In the distant past, a variety of herbs were used to pair with the malt in beer. But for the last thousand years or so, it’s pretty much been a one-plant show: hops. The bitter acids contained in the cone of the hop were perfectly suited to smoothing out the malty flavors in beer, making them easier to drink. As an added bonus, these same acids also acted as a natural antibacterial, slowing beer spoilage. This effect was greatly relied upon in the days before pasteurization, and it is one of the key reasons that hops became the primary bittering agent in beer.
In addition to bittering the beer, the essential oils in hops lend beer a huge variety of flavors and aromas, ranging from earthy to herbaceous, or even tropical. And what’s really cool about hops is that the process for extracting their bitterness and the process for extracting their flavors and aromas are mutually exclusive. While the bittering alpha acids in hops are only released at boiling temperatures, these same temperatures will quickly dissipate the extremely volatile aroma and flavoring oils contained in the hop cone. Likewise, the cooler temperatures used to coax the aromatics out of hops are not nearly hot enough to dissolve (isomerize, technically) the bitter alpha acids. As a result, brewers have a huge amount of control over the hop character of their beer. If they prefer their beer to be malt driven, with just enough of a clean bitterness to balance out the brew, they will add the hops early on during the boil. Conversely, if a brewer wants to really highlight the aromatics of a beer without it being face-puckeringly bitter, they will add the hops just at the end of the brewing process. Usually it’s a combination of the two, with some hops added at the beginning and others at the end.
Water
Many people completely forget about water when listing the components of beer, even though it usually represents over 95% of the final product! More than a simple vehicle for holding the other ingredients, water lends many essential, if overlooked, characteristics to beer. The presence (or lack of) minerals in an area’s water supply can have huge impacts on how a beer will taste. In fact, for most of beer’s history, certain styles were associated to a specific region for this reason. Long before anyone knew to measure the mineral content of well water, people realized that the English town of Burton on Trent made some of the best bitter beers on earth. Only later was it discovered that the unique qualities of Burton beer were due to the high sulfate levels of the water there, which accentuated the bitter flavors of their beer.
In Munich, the water had hardly any sulfates but instead was rich in carbonate. As a result, any hoppy beer the local brewers tried to make (and they certainly did try!) would turn out harsh and unpalatable. But that same local water’s rich calcium content helped to promote the soft, full mouthfeel of more malt-prominent beers such as dunkel.
On the opposite end of the spectrum, the Czech town of Plzen has water with almost no mineral content to speak of. This amazingly soft water allowed the bright, clean-tasting lagers of their namesake to dominate the world!Today, modern brewing technology has given brewers from anywhere in the world the ability to analyze their own water source and adjust it as needed. In fact, it is now common practice in larger breweries to strip out all mineral content totally, only to add them back in precise measurements. Nowadays adjusting water levels is an ordinary step for any brew day.
Yeast
If you asked a random person on the street to describe beer, the first two things they would likely say is “alcohol” and “carbonated”. What that person may not know is that both of those traits are entirely the responsibility of yeast. Once introduced into unfermented beer (wort), yeast will immediately begin to consume the sugars from the malt. Yeast convert this sugar to alcohol, with an added byproduct being carbonation. To put it more crudely, yeast eat sugar, pee alcohol and fart carbonation!
Once the yeast have consumed all the available sugars in the beer, they will go dormant and slowly settle at the bottom of the tank, leaving clear beer above. This process is called “dropping bright, and is usually sped up by the brewer though the use of fining agents or mechanical filtering before packaging into bottles, cans, or kegs. This allows for a clear, bright final product.
Some beers are intentionally left in contact with the yeast, either to add flavor or to allow the beer to continue to condition after bottling. If you even see the term “bottle conditioned” on a beer, that means there was active yeast left or added to the bottle. Bottle conditioned beers can often be cellared for long periods of time to gradually evolve in flavor.
Ale vs. Lager
Yeast can be categorized into two main families: ale yeast and lager yeast. As a result, all beers are either ales or lagers. (Of course, as with everything, there are exceptions here, but I’m talking 99.99% of all beer made is either an ale or a lager. Stout? Ale. Pilsner? Lager. Wheat beers? Ale. Octoberfest? Lager.)There are many different types of ales, much more than lager, but all share at least one thing in common: they use top-fermenting yeast, also known as ale yeast. Ale yeasts tend to collect at the top of the fermenting beer in thick, pillowy clumps.Ale yeasts are happiest at moderately high temperatures, around 60-70 degrees, although some farmhouse beers can go as high as 85 degrees. At these warmer temperatures, the rate of fermentation speeds up, one of the reasons ales typically take less time to make than lagers (the other reason being reduced maturation time). As the yeast ferment faster and faster, they also tend to ferment less efficiently. That means in addition to alcohol and carbon dioxide, ale yeast also release large amounts of flavorful esters and phenols into the beer. This is where the fruity, spicy qualities of many ales come from. It’s actually quite amazing how strongly these yeasts can flavor a beer. It’s hard to believe when tasting the immense banana and clove flavors of a German hefeweizen that there aren’t actually any fruit or spices added to the beer. It’s all the yeast!
Lager yeast on the other hand, wouldn’t do so well at these high ale temperatures. They require cooler temperatures, in the neighborhood of 50 degrees or so. There, the yeast can slowly and efficiently do their work, without letting off any of the byproducts found in ales. The result is a much cleaner tasting beer, where flavors provided by the yeast take a back seat to the malt and hops. Lager yeasts also tend to do their work lower down in the fermentation vessel, which is why they are referred to as being bottom-fermenting.
Other Ingredients
In addition to the big four ingredients of malt, water, hops and yeast, brewers can further modify their recipes with a variety of other substances. The Belgians are especially adept at this, adding spices such as coriander or the flavorful peel of the curacao orange to their Wit Biers, fermentable sugars to their strong golden and dark ales to boost a brew’s strength while keeping it drinkable, or fermenting with fruits such as cherries or raspberries as is done with the wonderfully tart lambics of Brussels. In recent decades, American brewers have taken a lesson from this historically Belgian practice of using adjuncts, which has resulted in some of the most interesting and innovative beers ever brewed.
-
Brewing Process
Overview
To learn all there is to know about brewing would take many years, and would probably involve getting one or more advanced degrees. Luckily, that isn’t needed to enjoy beer. However, a cursory understanding of what happens in the brewhouse is useful for beer connoisseurs to have, since almost all of the flavors encountered while tasting beer were the result of what happened while it was being brewed. Below is a brief overview of the basic steps of beer brewing. If you haven’t yet checked out the ingredients section, you may want to look there too, since a lot of the information in that section is built on here.
Milling
The first thing a brewer needs to do before getting to work making beer is to ensure that their brewing grain is ready to go. Assuming they aren’t malting their own barley, this means milling, or crushing, the grains. This crucially important step can make or break a beer before it has even begun. The key is to crush the grains enough so that it exposes the starchy center of the barley seed without damaging the grain hulls that encase them. If the crush is too coarse, not enough of the starch will be converted to fermentable sugars. If the crush is too fine, the husks, which act as a filter bed for the brew will be destroyed, and the brew will become gummy and unusable.
Mashing
Once the grain has been milled, it is added to a large vessel called the mash tun, and mixed with hot water to form the mash. That’s when the magic starts to happen. The heat from the water (referred to as liquor in breweries) activates the enzymes within the barley. These enzymes then begin to convert the starches in the grains into sugars.
Since there are several different types of enzymes within barley, each with a preferred temperature at which they like to work, brewers monitor the mash temperatures extremely close. By raising and lowering the temperature of the mash, brewers can control what types of sugars are produced by the enzymes. At lower temperatures, highly fermentable sugars are created, resulting in dry beers. At higher temperaturs, the sugars aren’t as easily digested by the yeast, resulting in a beer with some sugars left unfermented, and thus a sweeter, more full-bodied end product. The enzymes work quickly too. Within about an hour they will be done converting starch to sugar, at which point the brewer will end the enzymatic activity by raising the temperature of the mash to over 200 degrees Fahrenheit, a process known as mashing out.
Lautering
The next step in the brewing process is the take the mash, and separate out the spent grain from the sugary liquid known as wort (pronounced wert). This process is called lautering.
To begin the lautering process, the mash is transfered to vessel with a false-bottom called a lauter tun. Here the clear wort is drained away from the hulls and barley grist. Water is also added during lautering, in order to extract even more of the fermentable sugars from the grain. This is known as sparging. Sparging must be done very gradually as to not disrupt the grain bed that acts as a natural filter for the wort. Brewers typically add sparge water at the same rate as the wort is being drained below, although some English brewing methods call for completely draining the wort, then adding water and doing it all over again. This second go-round of lautering is called second runnings, and was historically made for small beers.
Brewers must be careful not the sparge for too long, as eventually the bitter tannins from the grain will also be stripped away.
Boil
Once the sweet wort has been separated from the grains, it is brought to a strong, prolonged boil for one to two hours. This boiling process is critical for many reasons. First, and from a historical point, most importantly, it sterilizes the beer. In today’s modern world, that seems fairly important, but for a long time this was quite literally a life-saver. For centuries people commingled their clean and run-off water supplies, leading their drinking water to become a town-well-sized petri dish for harmful bacteria. Of course, people didn’t understand this. They just knew the water was unsafe, and that something in the brewing process made water ok to drink. It’s for this reason that everyone drank beer, including small children.
Boiling does more than sterilize the brew, however. Hops introduced to boiling water will begin to break down, or isomerize, molecularly altering the composition of the acids within the hops and releasing bitterness into the beer. The longer the hops are boiled, the more of their alpha acids will be isomerized in order to lend bitterness to the brew. Hops added to the boil to lend bitterness are called early hop additions, and are generally allowed to boil in the beer for an hour or more.
Hops added later in the boil don’t bitter the beer all that much, but instead lend flavor and aroma. This is because in addition to alpha acids, hops also contain highly volatile, and very pungent oils, which break down quickly in boiling water. However if only exposed to the boiling wort for a short period of time, or at lower temperatures, hops will release these oils and lend aromatics and flavor to the beer. To extract flavor, brewers typically add hops about 10-15 minutes before the end of the boil. For aroma, hops are added even later, no more than 2 minutes before the end of the boil. Often aromatic hop additions even occur just after the boil ends.
Once the boil is completed it is sent to a whirlpool to collect any hop matter and coagulated proteins that have accumulated. Then it is immediately cooled. Cooling the beer quickly is important, since the beer will begin to oxidize and produce off flavors almost immediately at these temperatures.
Fermentation
Once the wort has been cooled, it is moved to a fermentor, which is usually just a large stainless steel vat (or on rare occasions, oak). Next yeast is added and the fun begins! From the moment the yeast is added it gets to work eating the sugars that were created during the mash. As they consume the sugar, the yeast expells carbon dioxide and alcohol, as well as a variety of flavor compounds that vary greatly depending on several variables such as the specific strain of yeast, and fermentation temperature of the beer. Fermentation time can vary greatly, from a few days for a simple ale, to over a month for lagers.
Fermentation is also where the brewer decides whether or not he/she will be brewing an ale or a lager. This decision is a simple choice of using lager yeast or ale yeast, although the brewing of the beer changes drastically depending on which direction the brewer goes.
If brewing an ale, which account for the majority of beers by style, the brewer will pitch ale yeast and let the temperature of the fermenting beer rise to a toasty 65-76 degrees – perfect for ale yeast. Also called top-fermenting yeast, ale yeast forms a thick layer pillowy foam at the top of the fermentation vessel. This is called a kräusen or pellicle, and if you didn’t know any better, you’d think it would kill you if you drank what was underneath it. But rest assured, there are no byproducts of beer, wanted or unwanted, that will hurt you (besides alcohol of course). This is a main reason why home brewing is legal. The worst you can do is make gross tasting beer!
If brewing a lager, the brewer must keep the beer much cooler, usually between 45 and 55 degrees. At these temperatures, the lager yeasts work slowly and efficiently towards producing a clean tasting beer with little flavors given from the yeast itself. Unlike ales, lagers yeast, or bottom fermenting yeast, do not form a pellicle at the top of the fermentation vessel.
Conditioning
Once the yeast has consumed all the available sugars, primary fermentation is over. While the beer is technically no longer fermenting, the yeast’s work is far from over. During the course of fermentation, several off flavors are created in addition to the production of alcohol and carbon dioxide. Common off flavors associated with under-conditioned or “green” beer is sulfur, butter, and green apples. Luckily, given enough time the yeast will absorb these off flavors. For ales, this conditioning can take a week or so. For lagers, whose yeast generally work more slowly, this can take months. To help speed up this process, some lager brewers employ the practice of kräusening, which is adding still fermenting wort (and the yeast inside it) to conditioning beer to help kick start the conditioning process.
Once fermentation is over, and the yeast have worked their way through the off-flavors, it becomes dormant and begins to settle to the bottom of the fermentation vessel. From here, the brewer can easily remove the yeast, leaving only bright, clear beer. To help this process along, many brewers also filter the beer mechanically, or by adding filtering agents which help collect the yeast into larger groups, which then fall out of suspension at a faster rate.
Packing
It’s easy to forget that the final step in the brewing process is packaging the beer. Luckily, brewers don’t forget this, or else we’d all be drinking directly from massive conditioning tanks (which now that I write it, sounds pretty awesome). In any regards, packaging is the process of putting the finished beer into vessels for mass consumption. Typically, beer is packing into bottles, cans, and kegs. Most brewers also force carbonate their beer just prior to packing, since they’ve allowed any CO2 developed during fermentation to escape into the atmosphere. Without allowing the CO2 to escape, the tanks could potentially rupture from the pressure build-up.
Some brewers practice bottle conditioning, meaning that instead of force carbonating, yeast and sugar are added to the beer after it has been packaged, to bring on a second fermentation inside the bottle, thereby adding depth of flavor, as well as carbonation. Bottle conditioning can also enhance the shelf life of beer, as the yeast will consume any oxygen that seeps into bottled beer.
-
Styles
More information on styles coming soon.
Pouring Beer
Learning the correct way to serve beer is probably the quickest and easiest thing a person can do to enhance their drinking experience. Ever remember being at a bar and getting handed an ordinary pint beer with absolutely no foam and the beer poured right up to the lip of the glass? If not, I don’t blame you, since I’m sure the experience was not memorable. On the other hand, can you remember being given a truly beautiful looking beer? Perhaps it was a wheat beer served in a tall, curving glass with a huge head of foam, and maybe a wedge of lemon placed on the rim? Or was it an ornate chalice filled with ruby red Belgian dubbel? Maybe it was a bright pilsner served into a tall, thin glass with a dollop of white foam on top. Chances are, those experience come more easily to mind. And while the beer itself may not have been different from the first scenario to the next few, the serving technique was, and it most likely had an impact on you whether you realized it at the time or not.
Pouring Beer from The Beer Temple on Vimeo.
Temperature
Most beers have an ideal serving temperature. There’s a chart below outlining which styles are served at what temperature, but as a general rule the temperature at which to serve a beer is correlated to the strength of the beer. As beers go up in alcohol, they are generally drunk at a warmer temperature. This is because stronger beers often are sipped slowly, and enjoyed for their complexity of flavor and aroma while weaker beers are often consumed for refreshment. For no style is this more apparent than American macro lagers, which are generally drunk so cold that you can’t taste them. There’s a reason those big brewers want people to drink their beers at tongue-numbing temperatures. As they warm up, they don’t taste very good.
| Very Cold: 35-40°F | Cold: 40-45°F | Cool: 45-50°F | Cellar: 50-55°F | Warm: 55-60°F |
|---|---|---|---|---|
|
American Adjunct Lagers Malt Liquors Light or low alcohol beers |
Pilsner Light-bodied lagers Kölsch Belgian Wit Hefeweizen Berliner Weisse American Wheat |
American Pale Ales Medium-bodied lagers India Pale Ale (IPA) Porters Alt Irish Stouts Sweet Stouts |
Sour Ales Lambic/Gueuze English Bitter Strong Ales Baltic Porters Bocks Scotch Ales Belgian Ales Trappist Ales |
Imperial Stouts Belgian Quads Belgian Strong Ales Barleywines Old Ales Dopplebock Eisbock |
Beer glassware comes in many shapes and sizes.
In Belgium, it’s common to have a different glass for each brand of beer! While breweries may claim that the glasses were designed specifically for their beer, and there’s no arguing the fun in drinking a beer from its own specific glass, the fact of the matter is that there are really only a few types of glasses you need to know about, in addition to a couple general principles about beer glassware.
Size
When drinking beer, the size of the glass matters. As the strength of the beer you are drinking goes up, the size of the glass you are drinking it from should go down. The reasons for this are pretty obvious. First, you generally drink strong beers in smaller portions, so you want the glass to be full at that portion size. That way, you aren’t drinking your 6 oz. tasting of English Barleywine as a thin film spread across the bottom of a 2 liter German boot, although that would be pretty awesome. Second, in big glasses, gravity aids in getting the beer to your mouth quickly. When taking a sip of that refreshing pilsner, as you tilt that long, tall glass up into the air, there’s a lot more beer being pulled towards your mouth. This accelerates the beer and makes taking big, satisfying sips easier. Try doing that with the English Barleywine and it will be half gone by your second sip. And since the Barleywine is likely two to three times the strength of the Pils, you’ll be half gone too!
Shape
As you most likely already know, there’s a wide variety of shapes for beer glassware. Usually the shape of the glass will highlight the defining feature of the beer that should go in it. With wheat beer glasses, for example, the tall, thin, lower portion of the glass highlights the striking color of the beer, while the bulbous top portion leaves plenty of room for a large fluffy head of foam. The overall size of the glass also makes it easy to drink large, thirst-quenching sips. Glasses that curve inwards toward the top, such as snifters and tulips, focus beer aromas at the rim of the glass. This is perfect for beers with complex noses, like Belgian Tripels or Imperial Stouts.
Types
Shaker Pint
The Shaker Pint was originally designed for bartenders to mix drinks in before serving. But the extremely sturdy – and cheap – shaker pint quickly became the glass of choice for beer in America. This glass lends little to the drinking experience.
Nonic Pint
The Nonic pint is basically the Shaker pint’s European cousin. The glass of choice in the UK, the Nonic has rounded flares at the top, presumably to help grip the glass, and is more visually appealing than the Shaker pint.
Pilsner Glass
Despite the name, Pilsner glasses are great for any light or medium bodied lager, such as Helles, Vienna, Dortmunder, and of course, Pilsner. The fluted shape of the glass promotes head retention and allows the delicate aromatics of lager to be released. They are also designed for drinkers to take large, refreshing gulps. Prost!
Weizen Glass
The tall, thin weizen glass is sure to get some ooh’s and ahh’s when served at the local pub. The lower portion of the glass highlights the striking color of the beer, while the bulbous top portion leaves plenty of room for a large, fluffy head of foam. The overall size of the glass also makes it easy to drink large, thirst-quenching sips.
Tulip Glass
Tulip glasses are perfect for a wide range of craft beers. The stem at the bottom keeps your hand from prematurely warming the beer, the inward curve toward the top collects aromas, and the oversized height of the glass above the bulb allows for plenty of foam. The most famous, and perhaps most beautiful tulip glass is made by the Belgian brewer Duvel Moortgat for their signature beer Duvel. When in doubt, reach for a tulip glass.
Goblet/Chalice
Goblets are most often associated with Belgian Abbey style ales such as Tripel or Dubbel. The heft of the glass matches the heft of the beer within, and the wide mouth of the glass allows for generous sipping. Goblets can be quite striking, and the custom versions of the glass for Trappist breweries such as Chimay and Orval have become synonymous with their beers.
Snifter
Snifter glasses are best used for strong, highly complex beers such as Russian Imperial Stout or Barleywine. The inward curved glass concentrates the aromas of the beer towards the drinker’s nose, and the large bulb allows room to swirl the beer, helping release the aromatics.
Stange Glass
Classically used for Alt Beers, Kölsch, Gose, and Pilsners, the stange beer glass is a simple cylinder shaped glass. They are typically used to serve a smaller volume of beer, less than 8 ounces. Visit a pub in Germany and you may see waiters carrying around special trays called Kranz to hold stange glasses.
Beer is a deceivingly simple drink.
Usually, it only has four ingredients: barley, hops, water, and yeast. However by adjusting these ingredients in small but significant ways, or by adding additional elements to the mix, brewers have an unlimited palette from which to paint from. The section below will give an overview of brewing ingredients, and how they can affect the final outcome of a beer.
Grains
Grains form the foundation on which beer is built. They lend flavor, aroma, color and mouthfeel to beer. They also provide the raw ingredients needed for the yeast to create alcohol. Quite simply, without grain, there is no beer.
Many grains can be used to brew beer. Without looking too hard, you can find beers brewed with wheat, oat, corn, rice, or rye. But without question, the undisputed king of brewing grains is barley, specifically malted barley.
Why is barley the brewing grain of choice? Well, as brewing Jedi Master Randy Mosher puts it, “Barley is the perfect brewing grain.” That’s because it naturally contains almost everything needed to make beer: high starch content, the enzymes needed to convert the starch to sugar, and proteins to aid in yeast health. Barley’s husks are even perfectly suited to act as a filter during the brewing process – which is crucial, as anyone who has ever had their brewing system gummed up with wheat or rye can tell you. Barley is so perfectly designed for making beer that anthropologists have suggested that the reason it was domesticated in the first place, roughly 10,000 years ago, was so that people could brew beer.
Six Row vs. Two Row Barley
There are two primary types of barley grown for brewing beer: two-row barley and six-row barley, each with their own set of distinct characteristics suited for different beer styles.
Six-row barley contains a higher enzyme count than two-row, making it the ideal barley type for American-style adjunct lagers since most adjunct grains do not contain enzymes themselves and require the added enzyme levels to help release their sugars.
Two-row barley contains plumper kernels, with higher starch levels for conversion to fermentable sugars. Two-row also has thinner husks and lower protein levels; it is the choice barley type for all-malt beers.
Malting Process
You may have noted that when people talk about the ingredients of beer they always refer to malted barley instead of just saying ‘barley’. This is because without the malting process the grain would be filled with complex sugars (starches) that are not digestible by brewers yeast. The malting process allows enzymes within the grain to form. These enzymes, when activated during the brewing process, will break down the grain’s long chains of complex sugars into more yeast-friendly simple sugars, such as maltose.
The actual process of malting is a series of several events. First, the person overseeing the process, called a maltster, soaks the grains in water to hydrate them. After a day or two, the maltster removes the grains and aerates them to induce germination. It’s at this time that the barley grains begin to sprout. The first sign of this germination is a small rootlet that appears out one end of the grain. The length of this root has a direct relationship to what’s going on within the barley kernel, so the maltster keeps a close eye on its progress. When the rootlet has reached a length equal to that of the kernel, the malt is said to be fully modified, meaning that the enzymes are now present in the barley, and all the starch has begun to be broken down to simpler sugars. Once this occurs, the maltster quickly heats the grains to kill them and stop the germination process. If the maltster stops this process too soon, there will still be starches in the barley that could have been converted to sugars, creating what is called undermodified malt. If the maltster does not act quickly enough, then the barley may begin consuming some of its own sugars as part of the growth process. This is called overmodified malt. It’s a very fine line for sure, and the timing must be perfect in order to make the highest quality malt.
Once the maltster has dried the kernels to stop seed growth, they continue to apply heat to toast the grain. It is this toasting process that provides the color and malty taste to beer. The lighter the toast, the lighter the color and malt profile it will lend to the finished beer. The heavier the toast, the darker and more full-bodied the grain will make the beer.
The lightest malts are called base malts and they make up majority of the grain bill for most beers. Even the darkest most flavorful Imperial Stouts will contain something in the neighborhood of 75% base malt. Base malts are typically dried quickly and at lower temperatures than darker malts. Pale, Pilsner, Vienna, and Munich are all example of base malts.
Darker malts, often called specialty malts, are darker and more flavorful than base malt. These malts start out the same as base malts, but are placed in a roaster after kilning. Barley roasted for short periods of time are said to be toasted and provide beers with rich, biscuity flavors and aromas. Malts roasted for longer periods are referred to as roasted malts and can take on intense coffee and chocolate-like flavors.
A little of these malts go a long way. Just a few percentages of a heavily roasted malt, such as black malt, can dominate the flavor of a beer. At extremely low quantities, they can also be used to dial in the desired color of a lighter brew. In fact, I’ve heard rumors that even Budweiser uses some black malt to help give an inkling of color to it.
Crystal Malts
The third major type of malts are crystal malts. Unlike other specialty malt types, crystal malts are not kilned prior to roasting. Instead, they are added directly to the roaster while wet and continually sprayed with water to be kept moist during cooking. The result is an intensely caramel like flavor. As a result of their unique roasting process, they also contain a portion of caramelized sugars which are no longer fermentable, thus lending a level of sweetness to the final beer.
Other Grains
While barley is the overwhelming favorite grain for brewers, it’s not their only choice. Beers brewed with Wheat, Rye, Oats, Rice, Corn, and sorghum can all be found without needing to look much further than your local beer store (with a decent selection).
These grains, and others, are collectively referred to as adjuncts when used in brewing beer. Adjuncts are never used exclusively in modern day commercial beers. Instead, they are as a supplement to the barley, lending texture, head retention, aroma and taste.
Wheat
After barley, the most well known brewing grain is wheat. Wheat has been used in brewing for about as long as barley; to this day, it is still central to many popular styles such as Hefeweizen, Belgian Wit, and American Wheat ales. Wheat beers are known for their creamy textures and huge fluffy heads of foam, both of which are hallmarks of wheat. In fact, many “non-wheat” beers use a small portion of wheat in their grain bills to help with head stability.
Rye
Using rye as an adjunct can lend beers a fantastic, spicy flavor and aroma. Though once quite popular as a brewing grain in Germany and various northern European countries such as Russia and Finland, rye has fallen out of favor in modern times. This could easily be at least in part due to rye’s notorious reputation as being difficult to brew with, turning an otherwise perfectly good brewing mash into gummy cement. For this reason, rye is usually used in moderate amounts and often accompanied with wheat. Even so, a little rye goes a long way and just a small amount can lend a huge punch of spicy flavor to beer. Like wheat, rye is also great for helping keep a fluffy head of foam on beers. Very recently, rye has begun to make something of a comeback in American craft breweries, who often pair the grain’s peppery flavor with hop bitterness.
Oats
Another grain with a checkered brewing history is oats. Once commonly used across Europe, the use of oats in brewing beer seemed all but extinct a hundred years ago. Then, around the early part of the 20th century, oats experienced a resurgence as brewers began marketing the nutritious qualities of oatmeal stout. Seen as a bit of a medical cure-all, British doctors were prescribing the beer to everyone from invalids to nursing mothers. Before long, the British government put an end to brewers advertising their beers as medicine, but by then people had gotten a taste for the rich, creamy taste of oatmeal stout, and it’s been around ever since. Like wheat and rye, oats help aid with head stability in beer. Oats also lend a slick ‘oily’ mouthfeel to beers.
Rice and Corn
The next two adjuncts, rice, and corn are both the most widely used and the most looked down upon by beer connoisseurs. This is because rice and corn are the adjuncts of choice for many of the macro lagers around the world, as they try to lend alcohol to a beer while having it remain light and drinkable (and as detractors would argue, tasteless!). This does not always need to be the case, however. Some crafts brewers use these adjuncts as well. In particular, beers brewed with wild rice can be wonderfully flavorful and worth searching out. But for the most part, you won’t even know these adjuncts are in your beer at all, which is just what the brewers want!
Hops
While grains form the backbone of all beers, if left unchecked, they can cause a beer to become undrinkably sweet. That is why brewers add other ingredients, usually something bitter, to counterbalance the malt. In the distant past, a variety of herbs were used to pair with the malt in beer. But for the last thousand years or so, it’s pretty much been a one-plant show: hops. The bitter acids contained in the cone of the hop were perfectly suited to smoothing out the malty flavors in beer, making them easier to drink. As an added bonus, these same acids also acted as a natural antibacterial, slowing beer spoilage. This effect was greatly relied upon in the days before pasteurization, and it is one of the key reasons that hops became the primary bittering agent in beer.
In addition to bittering the beer, the essential oils in hops lend beer a huge variety of flavors and aromas, ranging from earthy to herbaceous, or even tropical. And what’s really cool about hops is that the process for extracting their bitterness and the process for extracting their flavors and aromas are mutually exclusive. While the bittering alpha acids in hops are only released at boiling temperatures, these same temperatures will quickly dissipate the extremely volatile aroma and flavoring oils contained in the hop cone. Likewise, the cooler temperatures used to coax the aromatics out of hops are not nearly hot enough to dissolve (isomerize, technically) the bitter alpha acids. As a result, brewers have a huge amount of control over the hop character of their beer. If they prefer their beer to be malt driven, with just enough of a clean bitterness to balance out the brew, they will add the hops early on during the boil. Conversely, if a brewer wants to really highlight the aromatics of a beer without it being face-puckeringly bitter, they will add the hops just at the end of the brewing process. Usually it’s a combination of the two, with some hops added at the beginning and others at the end.
Water
Many people completely forget about water when listing the components of beer, even though it usually represents over 95% of the final product! More than a simple vehicle for holding the other ingredients, water lends many essential, if overlooked, characteristics to beer. The presence (or lack of) minerals in an area’s water supply can have huge impacts on how a beer will taste. In fact, for most of beer’s history, certain styles were associated to a specific region for this reason. Long before anyone knew to measure the mineral content of well water, people realized that the English town of Burton on Trent made some of the best bitter beers on earth. Only later was it discovered that the unique qualities of Burton beer were due to the high sulfate levels of the water there, which accentuated the bitter flavors of their beer.
In Munich, the water had hardly any sulfates but instead was rich in carbonate. As a result, any hoppy beer the local brewers tried to make (and they certainly did try!) would turn out harsh and unpalatable. But that same local water’s rich calcium content helped to promote the soft, full mouthfeel of more malt-prominent beers such as dunkel.
On the opposite end of the spectrum, the Czech town of Plzen has water with almost no mineral content to speak of. This amazingly soft water allowed the bright, clean-tasting lagers of their namesake to dominate the world!
Today, modern brewing technology has given brewers from anywhere in the world the ability to analyze their own water source and adjust it as needed. In fact, it is now common practice in larger breweries to strip out all mineral content totally, only to add them back in precise measurements. Nowadays adjusting water levels is an ordinary step for any brew day.
Yeast
If you asked a random person on the street to describe beer, the first two things they would likely say is “alcohol” and “carbonated”. What that person may not know is that both of those traits are entirely the responsibility of yeast. Once introduced into unfermented beer (wort), yeast will immediately begin to consume the sugars from the malt. Yeast convert this sugar to alcohol, with an added byproduct being carbonation. To put it more crudely, yeast eat sugar, pee alcohol and fart carbonation!
Once the yeast have consumed all the available sugars in the beer, they will go dormant and slowly settle at the bottom of the tank, leaving clear beer above. This process is called “dropping bright, and is usually sped up by the brewer though the use of fining agents or mechanical filtering before packaging into bottles, cans, or kegs. This allows for a clear, bright final product.
Some beers are intentionally left in contact with the yeast, either to add flavor or to allow the beer to continue to condition after bottling. If you even see the term “bottle conditioned” on a beer, that means there was active yeast left or added to the bottle. Bottle conditioned beers can often be cellared for long periods of time to gradually evolve in flavor.
Ale vs. Lager
Yeast can be categorized into two main families: ale yeast and lager yeast. As a result, all beers are either ales or lagers. (Of course, as with everything, there are exceptions here, but I’m talking 99.99% of all beer made is either an ale or a lager. Stout? Ale. Pilsner? Lager. Wheat beers? Ale. Octoberfest? Lager.)There are many different types of ales, much more than lager, but all share at least one thing in common: they use top-fermenting yeast, also known as ale yeast. Ale yeasts tend to collect at the top of the fermenting beer in thick, pillowy clumps.
Ale yeasts are happiest at moderately high temperatures, around 60-70 degrees, although some farmhouse beers can go as high as 85 degrees. At these warmer temperatures, the rate of fermentation speeds up, one of the reasons ales typically take less time to make than lagers (the other reason being reduced maturation time). As the yeast ferment faster and faster, they also tend to ferment less efficiently. That means in addition to alcohol and carbon dioxide, ale yeast also release large amounts of flavorful esters and phenols into the beer. This is where the fruity, spicy qualities of many ales come from. It’s actually quite amazing how strongly these yeasts can flavor a beer. It’s hard to believe when tasting the immense banana and clove flavors of a German hefeweizen that there aren’t actually any fruit or spices added to the beer. It’s all the yeast!
Lager yeast on the other hand, wouldn’t do so well at these high ale temperatures. They require cooler temperatures, in the neighborhood of 50 degrees or so. There, the yeast can slowly and efficiently do their work, without letting off any of the byproducts found in ales. The result is a much cleaner tasting beer, where flavors provided by the yeast take a back seat to the malt and hops. Lager yeasts also tend to do their work lower down in the fermentation vessel, which is why they are referred to as being bottom-fermenting.
Other Ingredients
In addition to the big four ingredients of malt, water, hops and yeast, brewers can further modify their recipes with a variety of other substances. The Belgians are especially adept at this, adding spices such as coriander or the flavorful peel of the curacao orange to their Wit Biers, fermentable sugars to their strong golden and dark ales to boost a brew’s strength while keeping it drinkable, or fermenting with fruits such as cherries or raspberries as is done with the wonderfully tart lambics of Brussels. In recent decades, American brewers have taken a lesson from this historically Belgian practice of using adjuncts, which has resulted in some of the most interesting and innovative beers ever brewed.
Overview
To learn all there is to know about brewing would take many years, and would probably involve getting one or more advanced degrees. Luckily, that isn’t needed to enjoy beer. However, a cursory understanding of what happens in the brewhouse is useful for beer connoisseurs to have, since almost all of the flavors encountered while tasting beer were the result of what happened while it was being brewed. Below is a brief overview of the basic steps of beer brewing. If you haven’t yet checked out the ingredients section, you may want to look there too, since a lot of the information in that section is built on here.
Milling
The first thing a brewer needs to do before getting to work making beer is to ensure that their brewing grain is ready to go. Assuming they aren’t malting their own barley, this means milling, or crushing, the grains. This crucially important step can make or break a beer before it has even begun. The key is to crush the grains enough so that it exposes the starchy center of the barley seed without damaging the grain hulls that encase them. If the crush is too coarse, not enough of the starch will be converted to fermentable sugars. If the crush is too fine, the husks, which act as a filter bed for the brew will be destroyed, and the brew will become gummy and unusable.
Mashing
Once the grain has been milled, it is added to a large vessel called the mash tun, and mixed with hot water to form the mash. That’s when the magic starts to happen. The heat from the water (referred to as liquor in breweries) activates the enzymes within the barley. These enzymes then begin to convert the starches in the grains into sugars.
Since there are several different types of enzymes within barley, each with a preferred temperature at which they like to work, brewers monitor the mash temperatures extremely close. By raising and lowering the temperature of the mash, brewers can control what types of sugars are produced by the enzymes. At lower temperatures, highly fermentable sugars are created, resulting in dry beers. At higher temperaturs, the sugars aren’t as easily digested by the yeast, resulting in a beer with some sugars left unfermented, and thus a sweeter, more full-bodied end product. The enzymes work quickly too. Within about an hour they will be done converting starch to sugar, at which point the brewer will end the enzymatic activity by raising the temperature of the mash to over 200 degrees Fahrenheit, a process known as mashing out.
Lautering
The next step in the brewing process is the take the mash, and separate out the spent grain from the sugary liquid known as wort (pronounced wert). This process is called lautering.
To begin the lautering process, the mash is transfered to vessel with a false-bottom called a lauter tun. Here the clear wort is drained away from the hulls and barley grist. Water is also added during lautering, in order to extract even more of the fermentable sugars from the grain. This is known as sparging. Sparging must be done very gradually as to not disrupt the grain bed that acts as a natural filter for the wort. Brewers typically add sparge water at the same rate as the wort is being drained below, although some English brewing methods call for completely draining the wort, then adding water and doing it all over again. This second go-round of lautering is called second runnings, and was historically made for small beers.
Brewers must be careful not the sparge for too long, as eventually the bitter tannins from the grain will also be stripped away.
Boil
Once the sweet wort has been separated from the grains, it is brought to a strong, prolonged boil for one to two hours. This boiling process is critical for many reasons. First, and from a historical point, most importantly, it sterilizes the beer. In today’s modern world, that seems fairly important, but for a long time this was quite literally a life-saver. For centuries people commingled their clean and run-off water supplies, leading their drinking water to become a town-well-sized petri dish for harmful bacteria. Of course, people didn’t understand this. They just knew the water was unsafe, and that something in the brewing process made water ok to drink. It’s for this reason that everyone drank beer, including small children.
Boiling does more than sterilize the brew, however. Hops introduced to boiling water will begin to break down, or isomerize, molecularly altering the composition of the acids within the hops and releasing bitterness into the beer. The longer the hops are boiled, the more of their alpha acids will be isomerized in order to lend bitterness to the brew. Hops added to the boil to lend bitterness are called early hop additions, and are generally allowed to boil in the beer for an hour or more.
Hops added later in the boil don’t bitter the beer all that much, but instead lend flavor and aroma. This is because in addition to alpha acids, hops also contain highly volatile, and very pungent oils, which break down quickly in boiling water. However if only exposed to the boiling wort for a short period of time, or at lower temperatures, hops will release these oils and lend aromatics and flavor to the beer. To extract flavor, brewers typically add hops about 10-15 minutes before the end of the boil. For aroma, hops are added even later, no more than 2 minutes before the end of the boil. Often aromatic hop additions even occur just after the boil ends.
Once the boil is completed it is sent to a whirlpool to collect any hop matter and coagulated proteins that have accumulated. Then it is immediately cooled. Cooling the beer quickly is important, since the beer will begin to oxidize and produce off flavors almost immediately at these temperatures.
Fermentation
Once the wort has been cooled, it is moved to a fermentor, which is usually just a large stainless steel vat (or on rare occasions, oak). Next yeast is added and the fun begins! From the moment the yeast is added it gets to work eating the sugars that were created during the mash. As they consume the sugar, the yeast expells carbon dioxide and alcohol, as well as a variety of flavor compounds that vary greatly depending on several variables such as the specific strain of yeast, and fermentation temperature of the beer. Fermentation time can vary greatly, from a few days for a simple ale, to over a month for lagers.
Fermentation is also where the brewer decides whether or not he/she will be brewing an ale or a lager. This decision is a simple choice of using lager yeast or ale yeast, although the brewing of the beer changes drastically depending on which direction the brewer goes.
If brewing an ale, which account for the majority of beers by style, the brewer will pitch ale yeast and let the temperature of the fermenting beer rise to a toasty 65-76 degrees – perfect for ale yeast. Also called top-fermenting yeast, ale yeast forms a thick layer pillowy foam at the top of the fermentation vessel. This is called a kräusen or pellicle, and if you didn’t know any better, you’d think it would kill you if you drank what was underneath it. But rest assured, there are no byproducts of beer, wanted or unwanted, that will hurt you (besides alcohol of course). This is a main reason why home brewing is legal. The worst you can do is make gross tasting beer!
If brewing a lager, the brewer must keep the beer much cooler, usually between 45 and 55 degrees. At these temperatures, the lager yeasts work slowly and efficiently towards producing a clean tasting beer with little flavors given from the yeast itself. Unlike ales, lagers yeast, or bottom fermenting yeast, do not form a pellicle at the top of the fermentation vessel.
Conditioning
Once the yeast has consumed all the available sugars, primary fermentation is over. While the beer is technically no longer fermenting, the yeast’s work is far from over. During the course of fermentation, several off flavors are created in addition to the production of alcohol and carbon dioxide. Common off flavors associated with under-conditioned or “green” beer is sulfur, butter, and green apples. Luckily, given enough time the yeast will absorb these off flavors. For ales, this conditioning can take a week or so. For lagers, whose yeast generally work more slowly, this can take months. To help speed up this process, some lager brewers employ the practice of kräusening, which is adding still fermenting wort (and the yeast inside it) to conditioning beer to help kick start the conditioning process.
Once fermentation is over, and the yeast have worked their way through the off-flavors, it becomes dormant and begins to settle to the bottom of the fermentation vessel. From here, the brewer can easily remove the yeast, leaving only bright, clear beer. To help this process along, many brewers also filter the beer mechanically, or by adding filtering agents which help collect the yeast into larger groups, which then fall out of suspension at a faster rate.
Packing
It’s easy to forget that the final step in the brewing process is packaging the beer. Luckily, brewers don’t forget this, or else we’d all be drinking directly from massive conditioning tanks (which now that I write it, sounds pretty awesome). In any regards, packaging is the process of putting the finished beer into vessels for mass consumption. Typically, beer is packing into bottles, cans, and kegs. Most brewers also force carbonate their beer just prior to packing, since they’ve allowed any CO2 developed during fermentation to escape into the atmosphere. Without allowing the CO2 to escape, the tanks could potentially rupture from the pressure build-up.
Some brewers practice bottle conditioning, meaning that instead of force carbonating, yeast and sugar are added to the beer after it has been packaged, to bring on a second fermentation inside the bottle, thereby adding depth of flavor, as well as carbonation. Bottle conditioning can also enhance the shelf life of beer, as the yeast will consume any oxygen that seeps into bottled beer.
More information on styles coming soon.